In this article
Help us make these docs great!
All rapyuta.io docs are open source. See something that's wrong or unclear? Submit a pull request.
Make a contributionDependency Composition
A deployment may depend on other deployments. It can access all topics, services, actions, endpoints, and configuration parameters exposed by other deployments at runtime.
Learning Objectives
The tutorial will show you how to create a dependent deployment using rapyuta.io console.
Prerequisites
- Device requirements
- You should have access to a device (computer or Raspberry PI 2 or 3) with an internet connection.
- Install the Google Chrome browser is on the device.
- Ensure that the ROS Melodic Morenia is installed on the device.
- You should be familiar with the map_server ROS package.
- You should be familiar with the below tools:
- Git
- UNIX/LINUX command terminal
- ROS topics
- ROS nodes
- ROS services
Estimated Time
30 minutes
Tutorial Walkthrough
You will add and deploy the dynamic_map_server package. It is a modified version of the original map_server package. The package offers a navigation map to other deployments that depend on it. Besides exposing the ROS topics: /map and /map_metadata, the package also exposes the /set_map service, which replaces the map published by /map topic.
Creating the build
To create the build, follow the below steps. Skip the following steps if you have already created an io-tutorials build earlier.
- On the left navigation bar, click Developmet>Builds
- Click on ADD NEW BUILD
- In the Build Name box, enter a name for the build, for example,
io-tutorials - In the Git repository box, enter the URL address :
https://github.com/rapyuta/io_tutorialsand select Build Recipe as Catkin. - Go to the next step and click on next, the build will be created.
The build takes about two to five minutes to build the source code in the io_tutorials repository into a running docker container. You may analyze the corresponding build logs, which help debug failing builds.
Please proceed to the creation of the package once the build is complete.
Create dynamic_map_server package
- On the left navigation bar, click Development > Packages.
- Click ADD NEW PACKAGE.
- You should provide information about the package, such as the name of the
package, its version, whether it is a singleton package, and a short description.
- In the Package Name box, type in the name of the package, for example,
dynamic_map_server - In the Package Version box, type in the version of the package. By default, the version is set to 1.0.0
- Ensure Is a singleton package option is not selected.
- Make sure Is a bindable package option is selected.
- In the Description box, provide a summary of the package, for
example,
A modified ROS map_server - Click NEXT
- In the Package Name box, type in the name of the package, for example,
- In the Component Name box, enter a name for the component, for example,
DynamicMapServerThe name of a component must consist of alphabets [A-Z, a-z], digits [0-9], hyphen - and underscore _ character, and must not begin with a digit.
- Select Cloud for Component Runtime.
- Ensure Is ROS Component is selected.
- Set the value of Replicas to run the component to number 1 (default value).
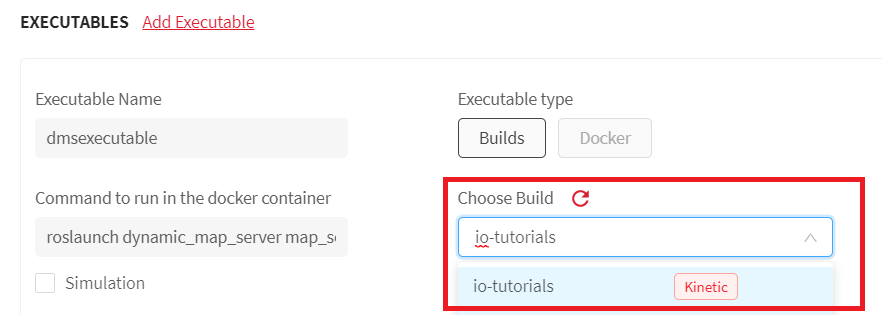
- In the Executable Name box, type in a name for the executable, for example,
dmsexecutable
The name of an executable must consist of alphabets [A-Z, a-z], digits [0-9], hyphen - and underscore _ character, and must not begin with a digit.
- For Executable Type, click on Development>Builds.
- In the Choose Build drop-down menu, select the build as
io-tutorials. - In the Command to run in the docker container box, copy and paste the command:
roslaunch dynamic_map_server map_server.launch
Ensure you always execute the roslaunch command for explicitly starting the ROS Master instead of running the rosrun command, because the ROS Master will fail to start on rosrun, and eventually, the deployment will fail as well.
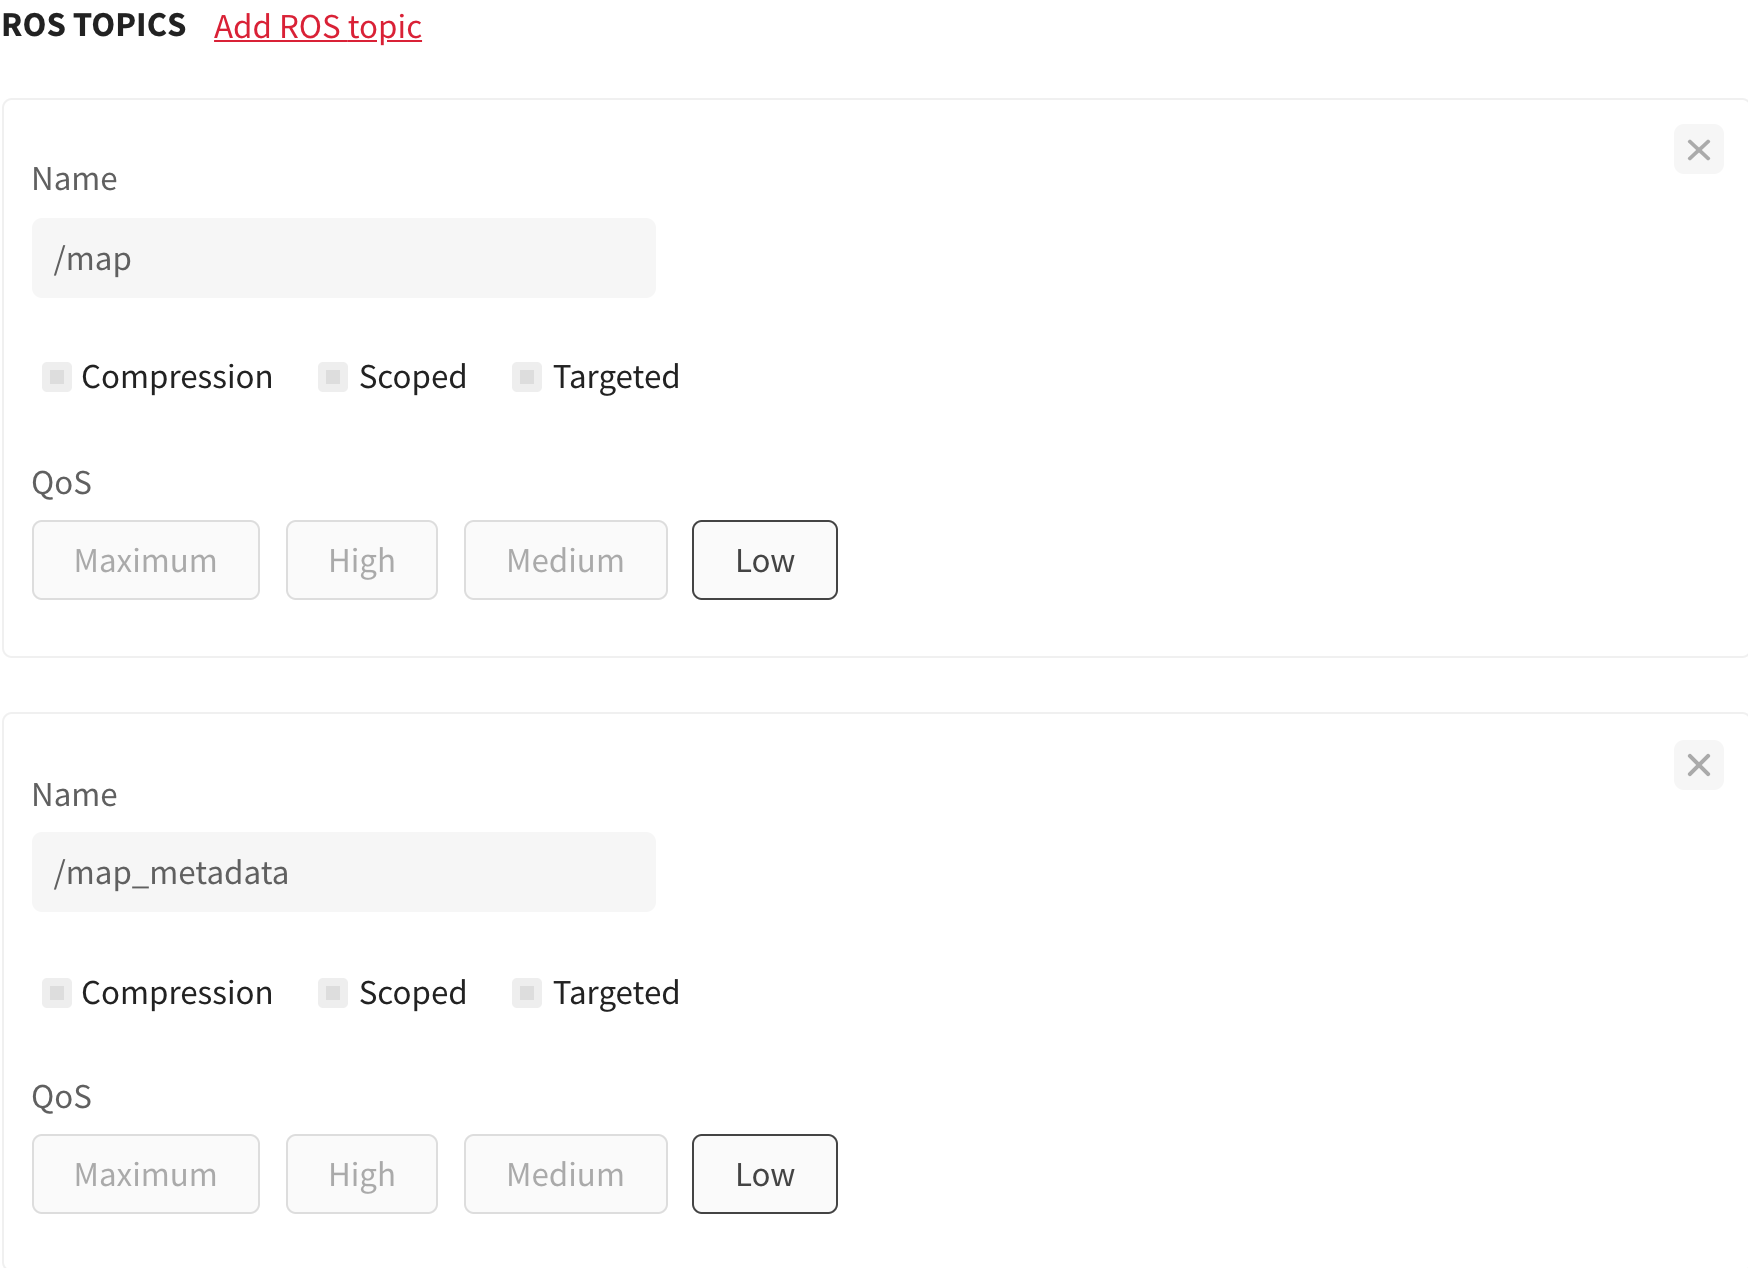
 12. To add a ROS topic, click Add ROS topic. In the Name box,
enter
12. To add a ROS topic, click Add ROS topic. In the Name box,
enter /map_metadata and set QoS to Low.
Similarly, add another ROS topic /map and set QoS to Low.
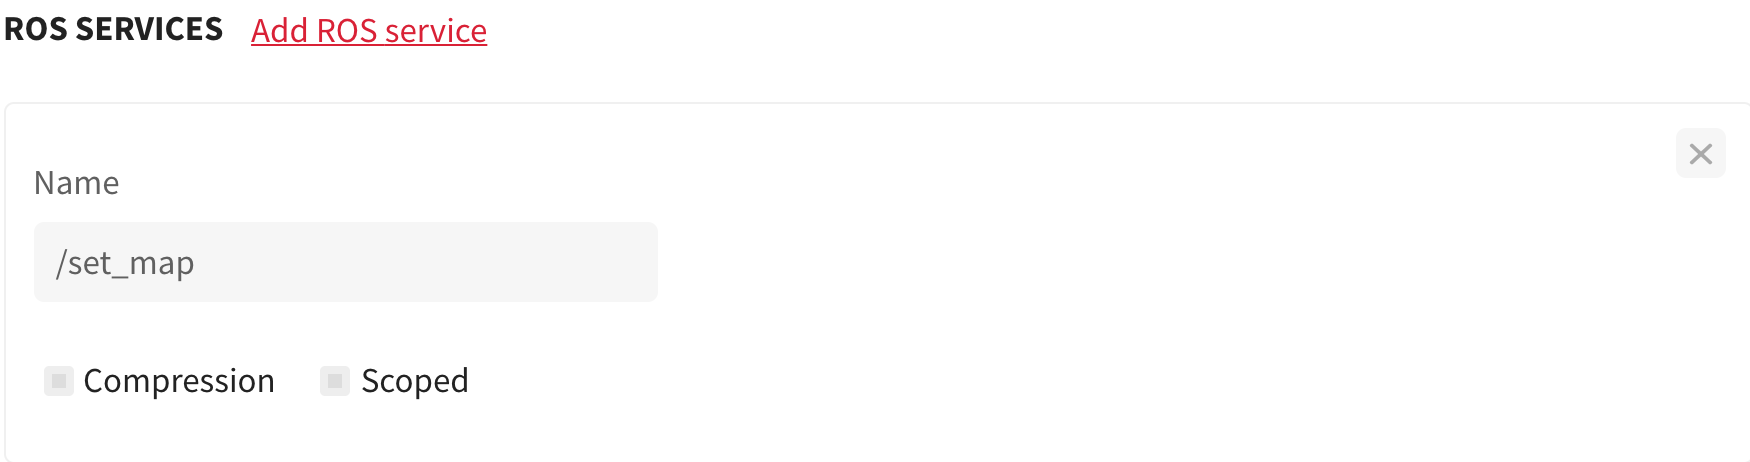
 13. To add a ROS service, click Add ROS service. In the Name box, enter
/set_map
 14. Click NEXT > CONFIRM PACKAGE CREATION.
Additionally, you may verify if the package is built successfully and is ready to be deployed by clicking to see if the Deploy package button is enabled.
Prepare and add a device
You will prepare a Raspberry Pi 2 or 3 as the device for this tutorial.
If you are using a custom rapyuta.io image on the device, the catkin workspace is already created, and the io_tutorials repository is already present in the workspace. Moreover, the source code is built for you.
In this tutorial, the catkin workspace is ~/catkin_ws/, but you may choose to name your catkin workspace as you like and ensure that you replace all occurrences to ~/catkin_ws/ with your workspace name.
If you are using either a computer with ROS installed on it or any device other than Raspberry PI, or a Raspberry PI without a custom rapyuta.io image, you will create a catkin workspace and get the io_tutorials repository into the workspace.
Hence, to create a catkin workspace on the device, you have to execute the following commands at the device terminal.
cd $HOME
mkdir -p catkin_ws/src
cd catkin_ws/src
git clone https://github.com/rapyuta/io_tutorials
source /opt/ros/melodic/setup.bash
cd ..
For the custom rapyuta.io image to support the build command, catkin build, you will set up the device by executing the following:
cd $HOME &&
mv catkin_ws catkin_old &&
curl https://storage.googleapis.com/artifacts.rapyuta.io/io_tutorials/catkin_ws_arm32v7.tar.gz | tar xz
The argument to the curl command, i.e., the URL address, changes based on the architecture of the device.
- For a device with an arm64 architecture, use https://storage.googleapis.com/artifacts.rapyuta.io/io_tutorials/catkin_ws_arm64v8.tar.gz
- For a device with an arm32 architecture, use https://storage.googleapis.com/artifacts.rapyuta.io/io_tutorials/catkin_ws_arm32v7.tar.gz
- For a device with an amd64 architecture, use https://storage.googleapis.com/artifacts.rapyuta.io/io_tutorials/catkin_ws_amd64.tar.gz
To build the source code in the catkin workspace, execute the below command in the root of the workspace:
catkin build map_listener
If you experience the error catkin:command not found, then the python-catkin-tools package is missing on the device, which is required for executing catkin build command. Install the package by running the command sudo apt-get install python-catkin-tools at the device terminal.
And then, you will add the device to rapyuta.io.
While adding the device, ensure that Use docker compose as default runtime checkbox is not selected.
Create map_listener package
You will create map_listener package, which will be deployed on the device. To create the package, follow the instructions:
- Click Development>Catalog > ADD NEW PACKAGE.
- You should provide information about the package such as the name of the package, its version number, whether it’s a singleton package, and a description.
- In the Package Name box, enter a name for the package, for example,
map_listener - In the Package Version box, enter the version of the package. By default, the version is set to 1.0.0
- Ensure Is singleton package option is not selected.
- Make sure Is a bindable package option is selected.
- In the Description box, provide a summary of the package, for example,
Runs a map_listener node on device - Click NEXT.
- In the Component Name box, provide a name for the component, for example,
MapListener - For Component Runtime, click Device.
- Ensure Is ROS Component is selected.
- Ensure the ROS Version is Melodic.
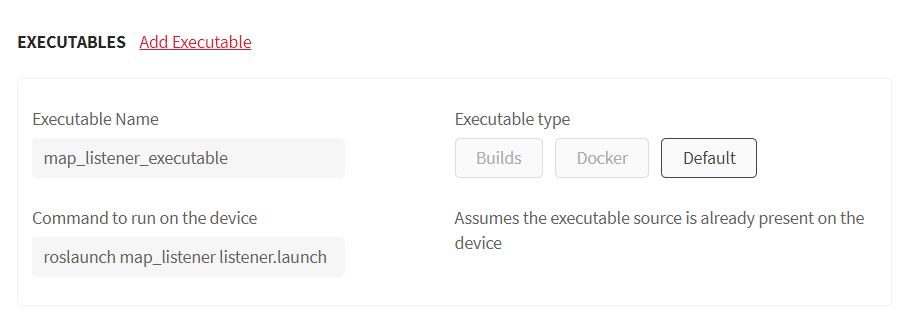
- In the Executable Name box, enter a name for the executable , for example,
map_listener_executable - For Executable Type, click Default.
- In the Command to run on the device box, copy and paste the command:
roslaunch map_listener listener.launch
Ensure you always execute the roslaunch command to explicitly start the ROS Master instead of running the rosrun command, because the ROS Master will fail to start on rosrun command, and
eventually, the deployment will fail as well.
 9. Click NEXT > CONFIRM PACKAGE CREATION.
Deploy dynamic_map_server package
To deploy dynamic_map_server package, follow the steps:
- On the left navigation bar, click Development > Packages.
- Select dynamic_map_server package.
- Click Deploy package.
- In the Name of deployment box, provide a name for the specific deployment
you are creating, for example,
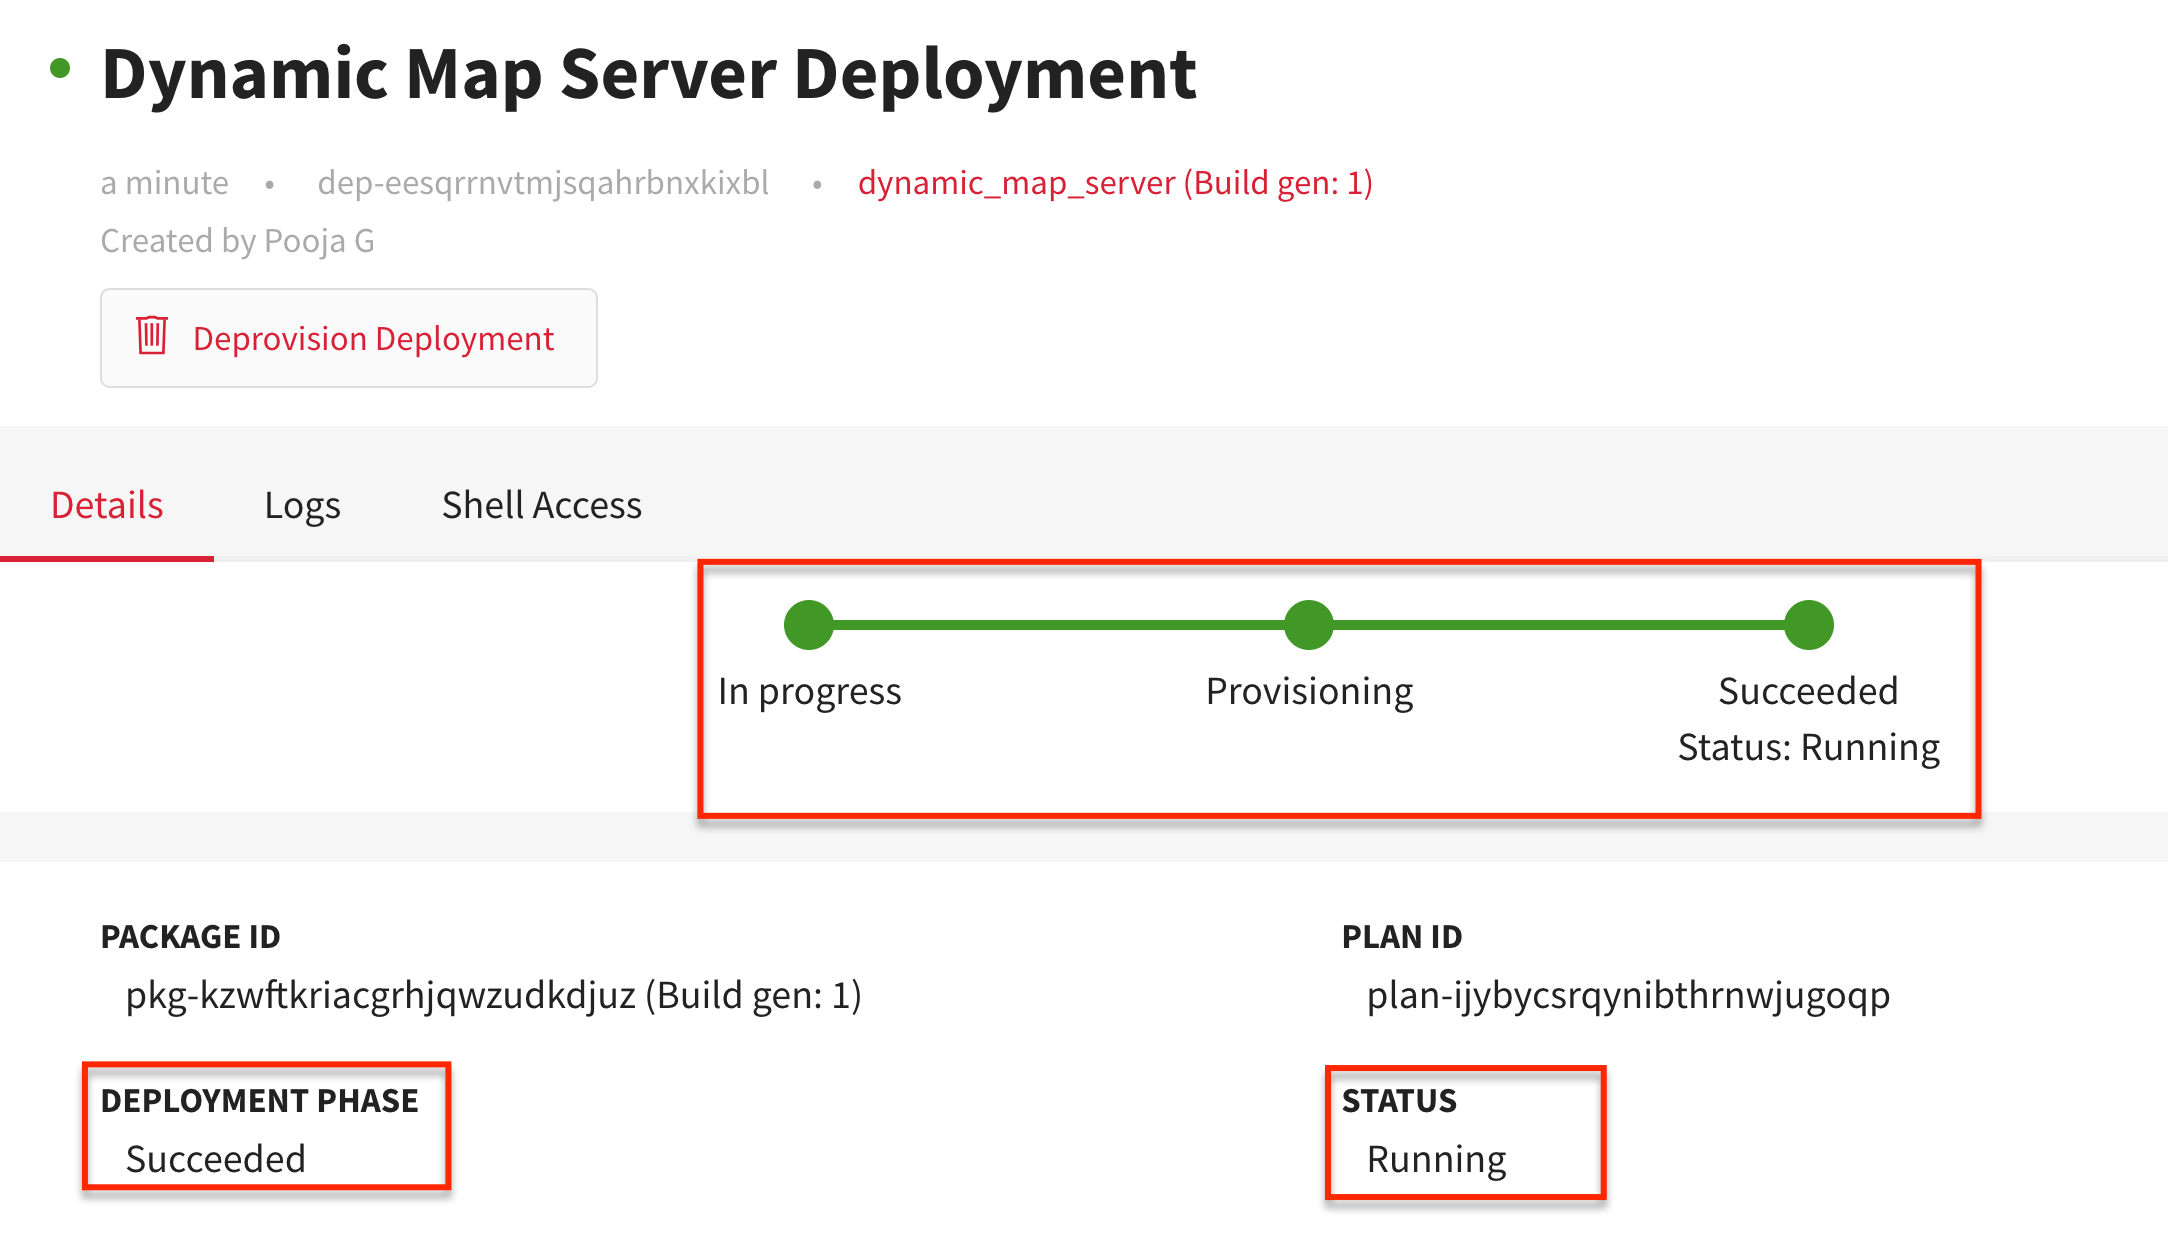
Dynamic Map Server Deployment - Click CREATE DEPLOYMENT > Confirm.
You will be redirected to the newly created deployment’s Details page. The Dynamic Map Server Deployment is successfully running only when the green colored progress bar moves to Succeeded and Status:Running, indicating that the DEPLOYMENT PHASE is Succeeded, and the STATUS is Running.
Deploy map_listener package
To deploy map_listener package, follow the steps:
- Click Development > Packages > select map_listener package > click Deploy package.
- In the Name of deployment box, provide a name for the specific deployment
, for example,
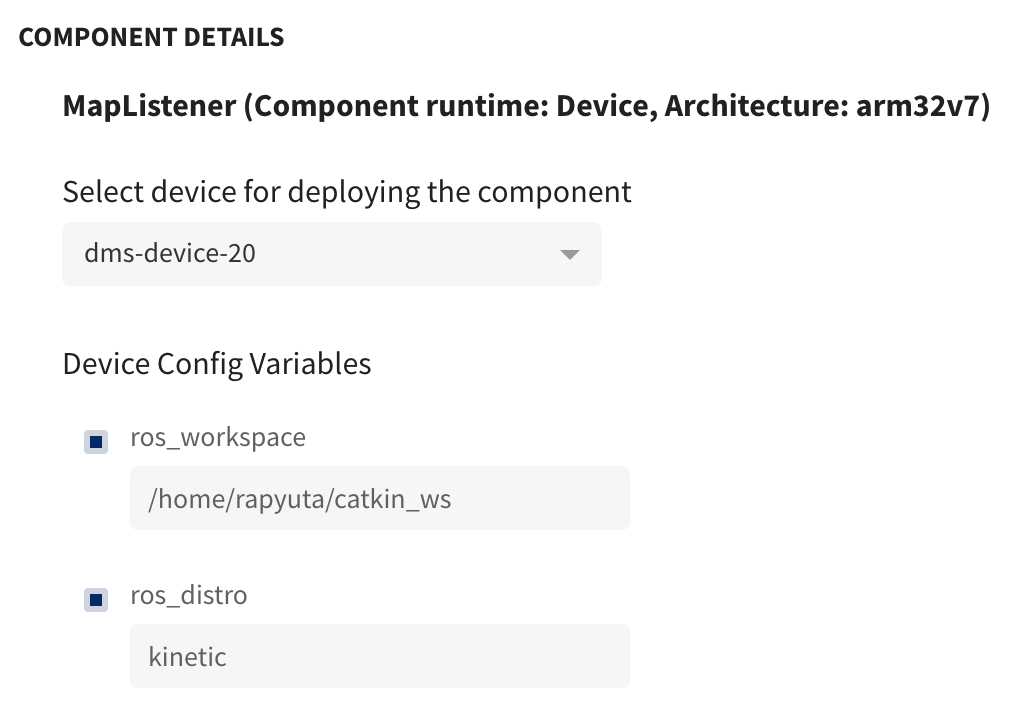
Map Listener Deployment - Since map_listener_executable has device runtime, you must select the device you want to deploy the component on. Click Refresh the list of online devices to retrieve an updated list of online devices.
- Select the device from the Select device for deploying the component drop-down list.
- Ensure that the ros_workspace and ros_distro are selected.
- Click Add dependency to add a dependent deployment.
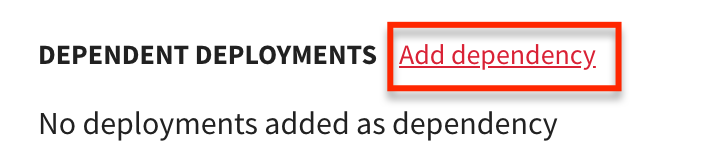
- Select Dynamic Map Server Deployment from the drop-down list of deployments. Ensure that the Dynamic Map Server Deployment is valid and is already running.
- Click CREATE DEPLOYMENT > Confirm.
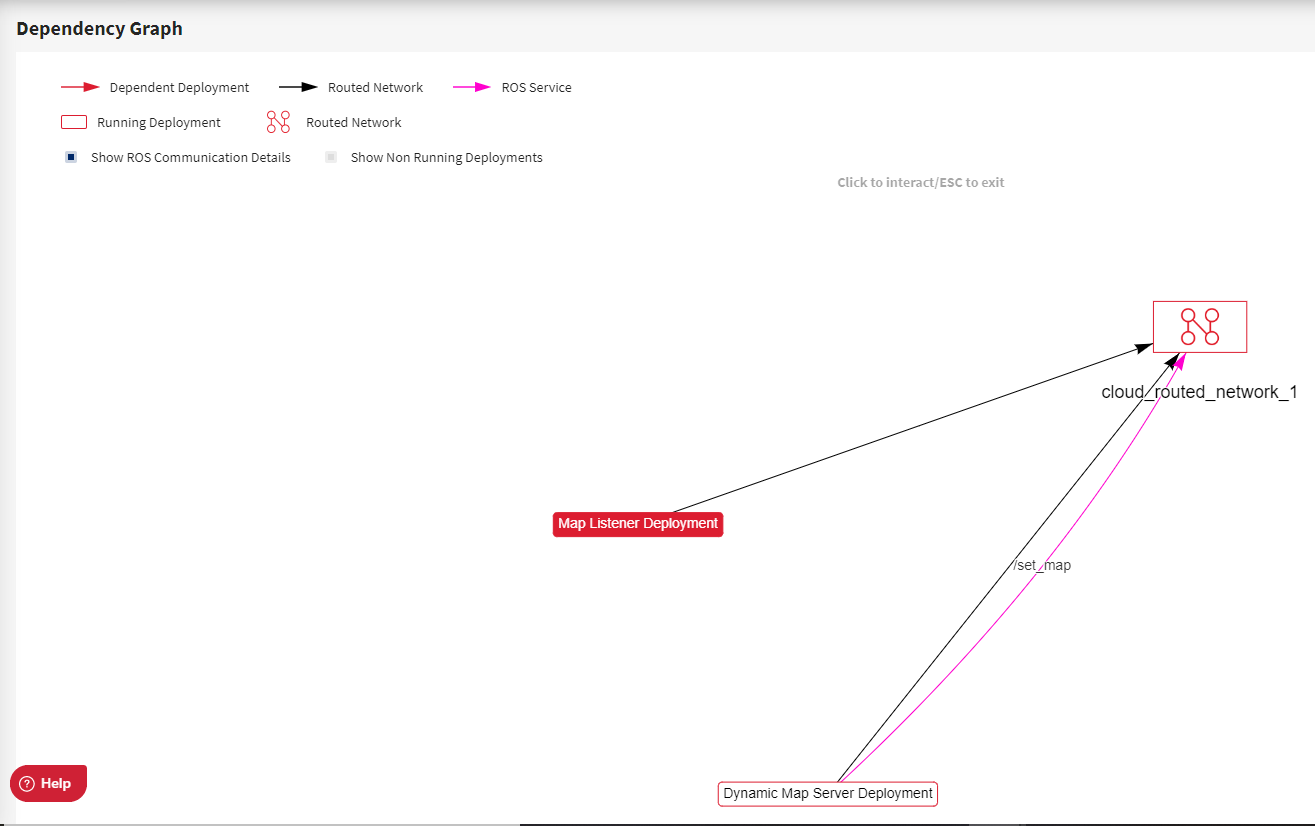
You can verify if the Map Listener Deployment is successfully running by checking if the green colored progress bar indicates that the DEPLOYMENT PHASE is Succeeded and the STATUS is Running.
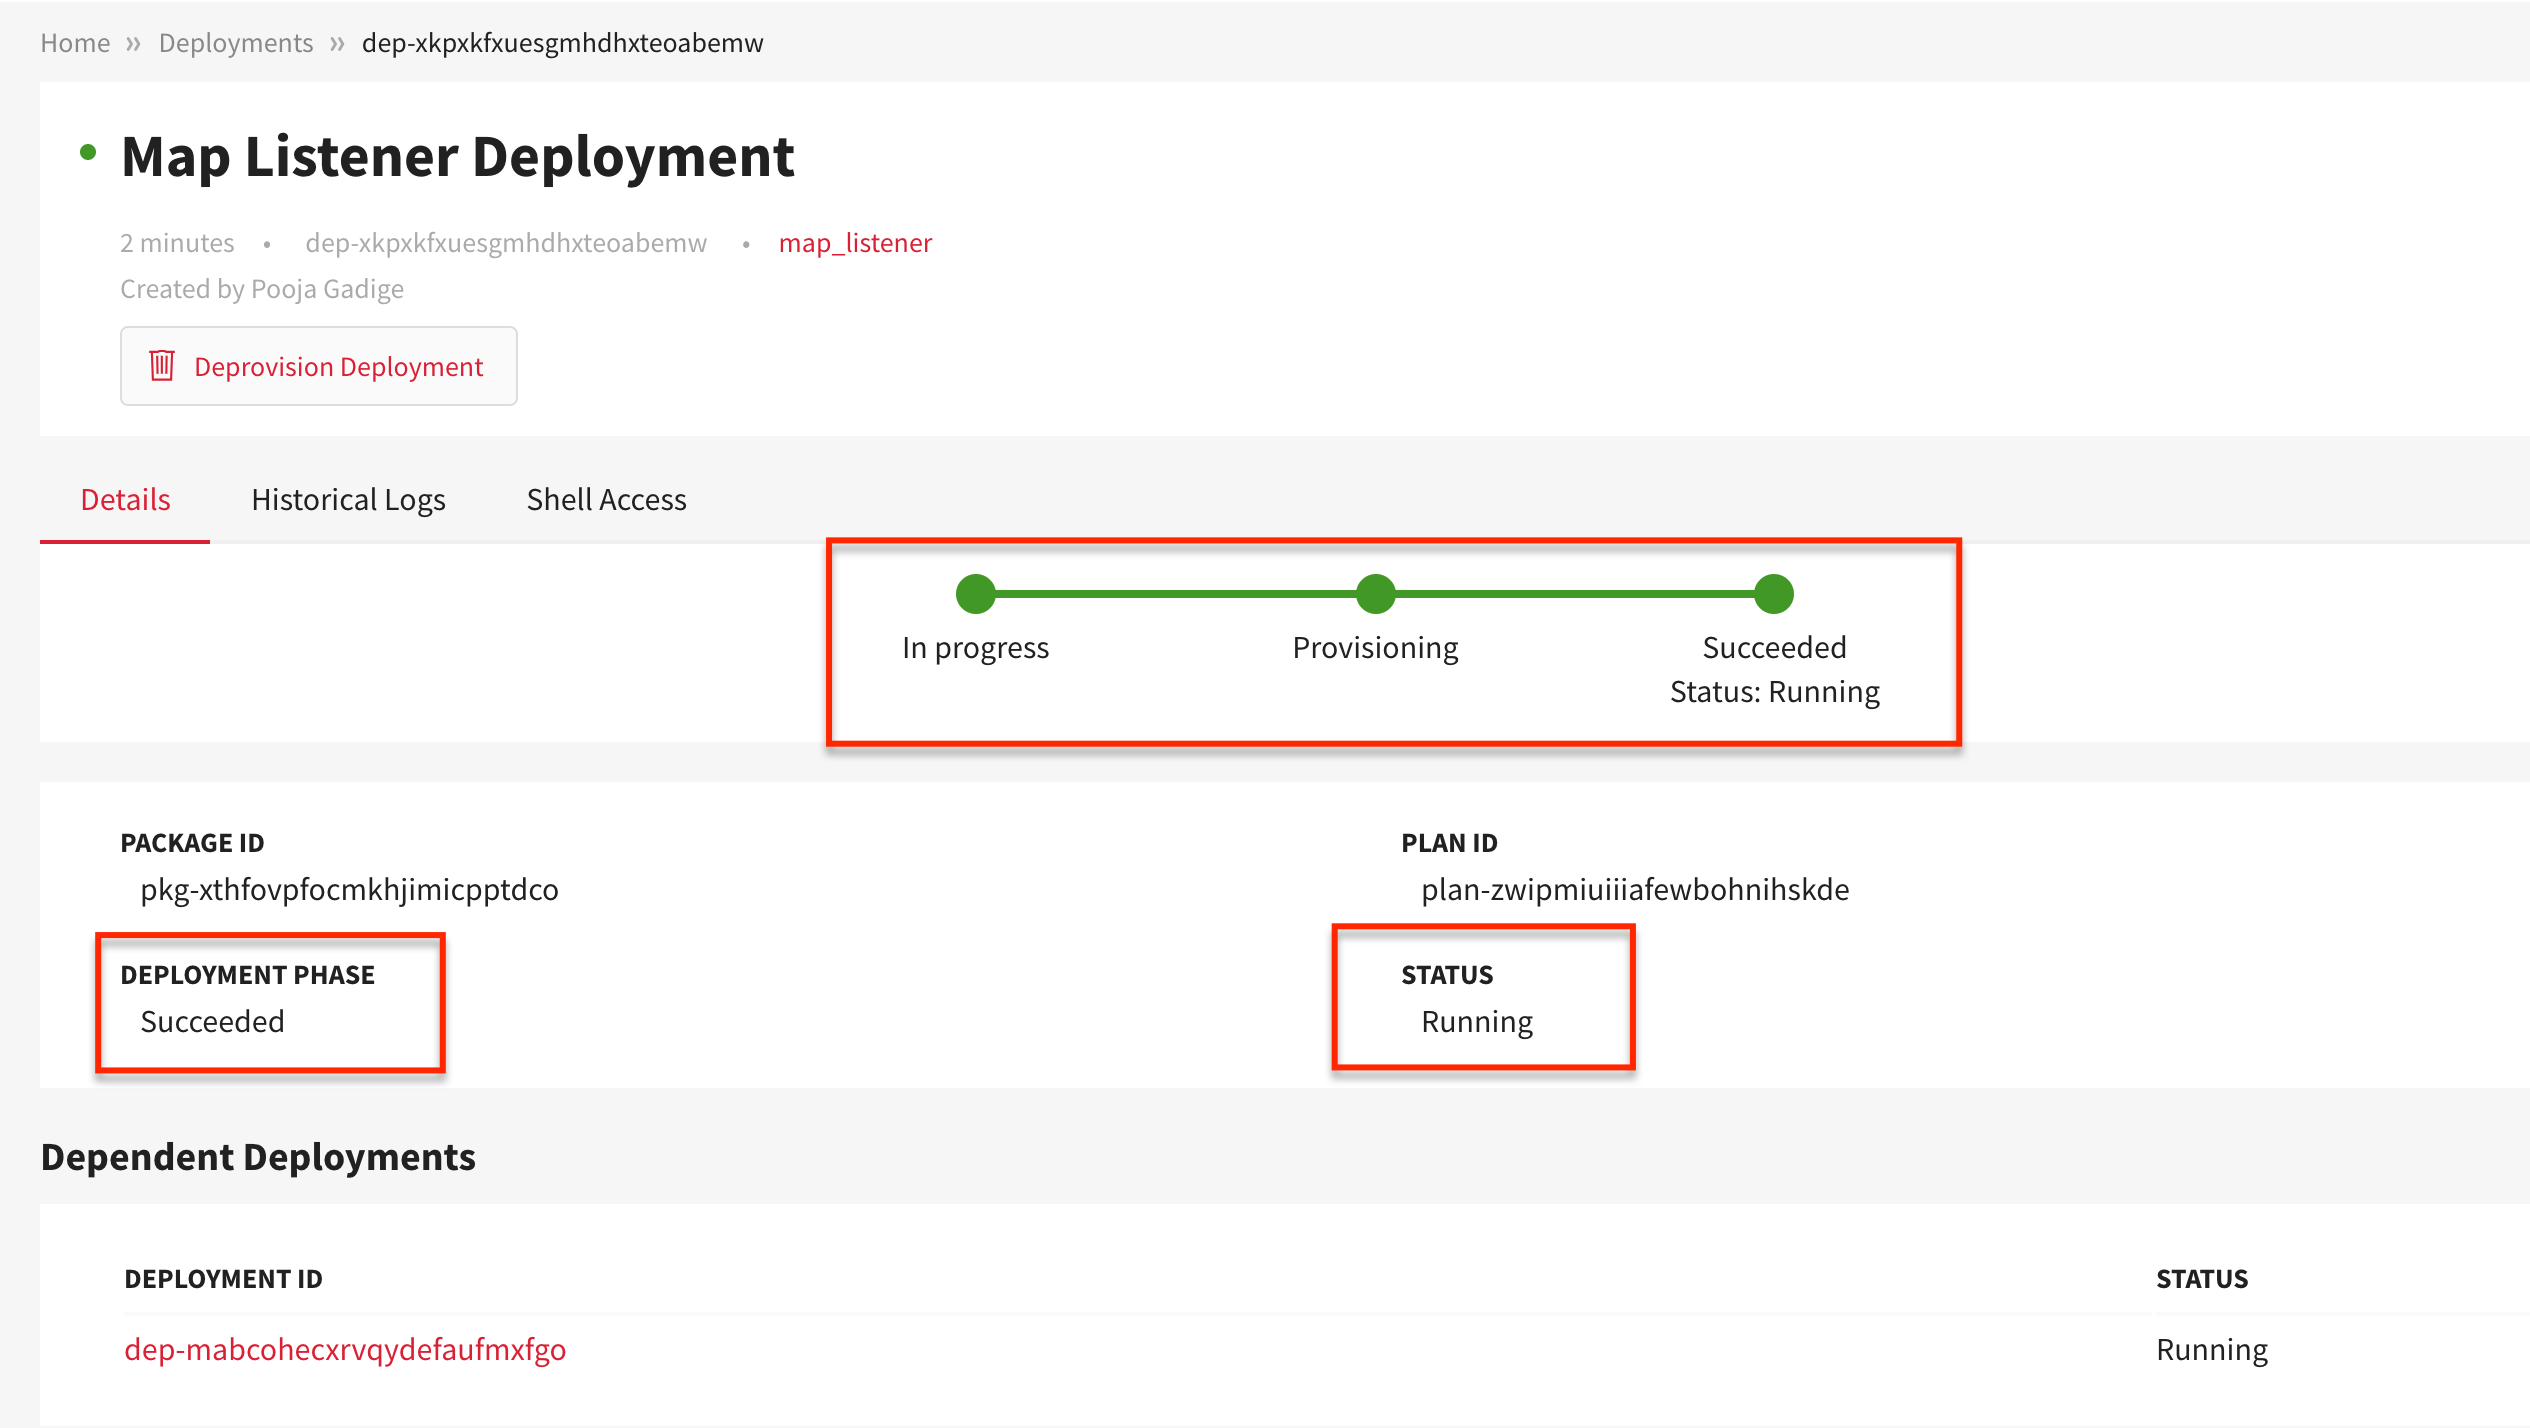
Ensure that the dependent deployment STATUS is Running as well.
The corresponding dependency graph will look as shown below:
To know whether map_listener has received the map data, execute the below command in the device’s terminal:
sudo tail /root/.ros/log/latest/map_listener-2.log
Sometimes map_listener stores the map data in map_listener-1.log file. Therefore, you are recommended to check all the files of the form map_listener-n.log where n is a positive integer if any file is empty.
You should see a similar output as shown below after executing the above command:
[rosout][INFO] 2018-01-26 06:18:56,565: Received map data
[rosout][INFO] 2018-01-26 06:18:56,578: Read a 4000 X 4000 map @ 0.0500000007451 m/cell
Update navigation map
In the device’s terminal window, execute the command:
sudo tail -f /root/.ros/log/latest/rosout.log
Open another terminal window, and run the command:
source ~/catkin_ws/devel/setup.bash
To pass an argument to the service /set_map, press the tab key (more than twice) to complete the rosservice call command:
rosservice call /set_map "map:
  header:
    seq: 0
    stamp:
      secs: 0
      nsecs: 0
    frame_id: ''
  info:
    map_load_time: {secs: 0, nsecs: 0}
    resolution: 0.0
    width: 0
    height: 0
    origin:
      position: {x: 0.0, y: 0.0, z: 0.0}
      orientation: {x: 0.0, y: 0.0, z: 0.0, w: 0.0}
  data: [0]
initial_pose:
  header:
    seq: 0
    stamp: {secs: 0, nsecs: 0}
    frame_id: ''
  pose:
    pose:
      position: {x: 0.0, y: 0.0, z: 0.0}
      orientation: {x: 0.0, y: 0.0, z: 0.0, w: 0.0}
    covariance: [0.0, 0.0, 0.0, 0.0, 0.0, 0.0, 0.0, 0.0, 0.0, 0.0, 0.0, 0.0, 0.0,
      0.0, 0.0, 0.0, 0.0, 0.0, 0.0, 0.0, 0.0, 0.0, 0.0, 0.0, 0.0, 0.0, 0.0, 0.0, 0.0,
      0.0, 0.0, 0.0, 0.0, 0.0, 0.0, 0.0]"
In the previous terminal window, you should see that the map_listener will receive a new map. The result may appear as shown below:
... INFO [listener.py:7(callback) [topics: /rosout, /map] Received map data
... INFO [listener.py:11(callback) [topics: /rosout, /map] Read a 0 X 0 map @ 0.0 m/cell