In this article
Help us make these docs great!
All rapyuta.io docs are open source. See something that's wrong or unclear? Submit a pull request.
Make a contributionBasic Web Application
This tutorial guides you to create a web application and deploy it in the rapyuta.io platform with the docker build recipe.
Learning objectives
The tutorial will show you how to use a docker file to build an executable of a package.
Prerequisites
- Ensure that the Google Chrome browser is installed on a computer.
- You should be familiar with the concepts of rapyuta.io.
Estimated time
10 minutes
Tutorial Video
Creating the build
To create the build, follow the below steps :
- On the left navigation bar, click Development>Builds.
- Click on ADD NEW BUILD
- In the Build Name box, enter a name for the build , for example,
web-app-build - In the Git repository box, enter the URL address :
https://github.com/rapyuta/io_tutorialsand select Build Recipe as Docker. - In the Context directory box, enter the name of the parent directory that contains the docker file.
In this example, it is
flask_helloworld. - Go to the next step and click on next, the build will be created.
The build takes about two to five minutes to build the source code in the io_tutorials repository into a running docker container. You may analyze the corresponding build logs, which help debug failing builds.
Please proceed to the creation of the package once the build is complete.
Creating the package
You will add and deploy simple-hello-world package. To create a new package, follow the below instructions in sequence:
- On the left navigation bar, click Development > Packages.
- Click ADD NEW PACKAGE.
- You should provide information about the package such as the name of the package, its version, whether it’s a singleton or bindable package, and a short description.
- In the Package Name box, type in a name for the package like
simple-hello-world - In the Package Version box, type in the version of the package. By default, the version is set to 1.0.0
- Ensure Is a singleton package is not selected.
- Make sure Is a bindable package is selected.
- Describe the package in a sentence or two like
Demo package for docker build recipe.
- In the Package Name box, type in a name for the package like
- Click NEXT.
- In the Component Name box, enter a name for the component, for example,
Flask_Application.The name of a component must consist of alphabets [A-Z, a-z], digits [0-9], hyphen - and an underscore _ character. It must not begin with a digit.
- Select Cloud for Component Runtime.
- Ensure Is ROS Component is not selected.
- The value of Replicas to run the component is set to the default value of 1
- In the Executable Name box, type in a name for the executable, for example,
flask_runner.The name of an executable must consist of alphabets [A-Z, a-z], digits [0-9], hyphen - and an underscore _ character. It must not begin with a digit.
- For Executable Type, click on Development>Builds.
- In the Choose Build select the Build
web-app-buildfrom the drop-down list.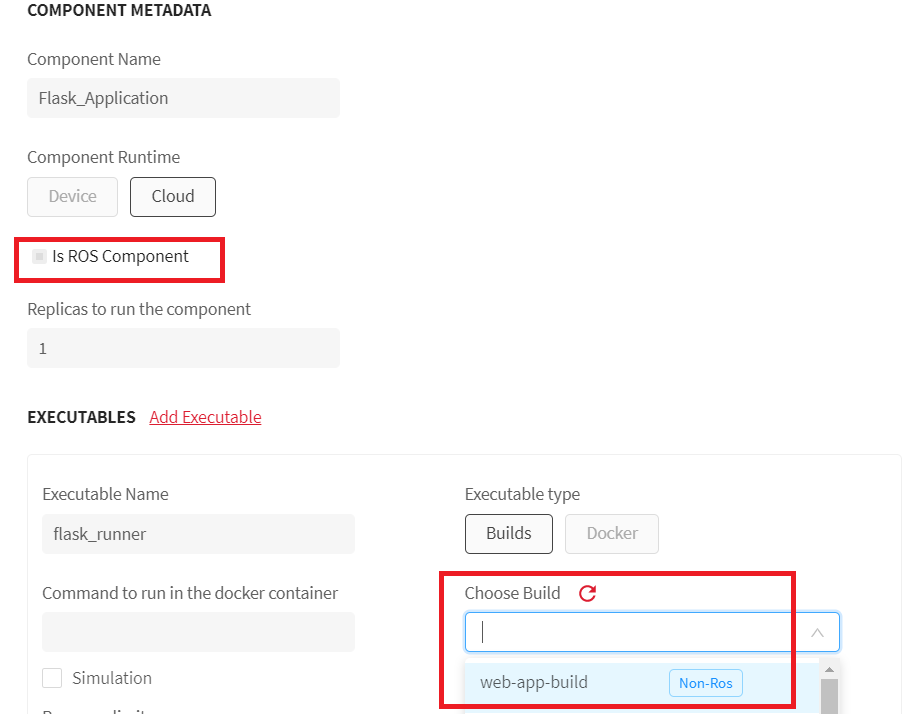
- You must expose a network endpoint for viewing the output of the tutorial:
- Click Add Endpoint.
- Provide a name for the endpoint, like
HELLO_WORLD, in the Endpoint Name box. - Make sure Exposed externally is selected.
- Click HTTPS/WSS under Protocol.
- The value of Port is automatically set to 443 because the protocol is HTTPS/WSS.
- In the Target Port box, enter
5000.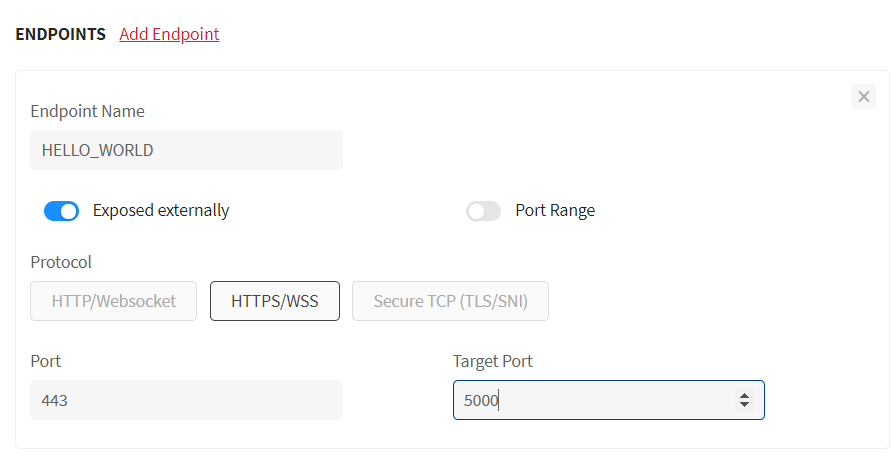
- Click NEXT > CONFIRM PACKAGE CREATION.
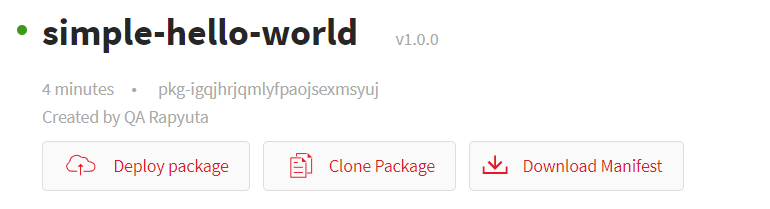
Additionally, you may verify if the package is built successfully and is ready to be deployed by checking to see if the Deploy package button is active.
Deploying the package
To deploy the simple-hello-world package, walk through the below instructions in sequence:
- On the left navigation bar, click Development>Catalog.
- Select simple-hello-world package.
- Click Deploy package.
- In the Name of deployment box, enter the name of the deployment you are creating like
Simple Flask Application. - Click CREATE DEPLOYMENT > Confirm.
You will be redirected to the Details page of the newly created deployment. The Simple Flask Application deployment is successfully running only when the green colored bar moves to Succeeded and Status: Running indicating that the DEPLOYMENT PHASE is Succeeded and the STATUS is Running.
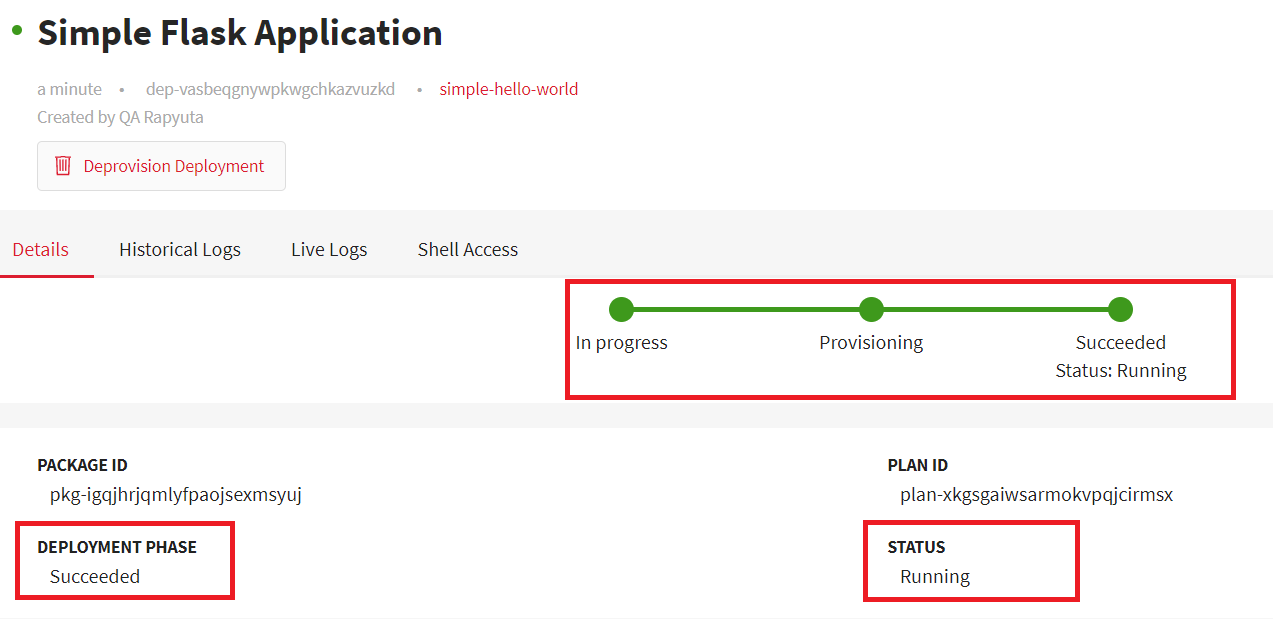
You can also analyze the corresponding deployment logs to check if everything is working as expected by clicking on the Historical Logs or Live Logs tab.
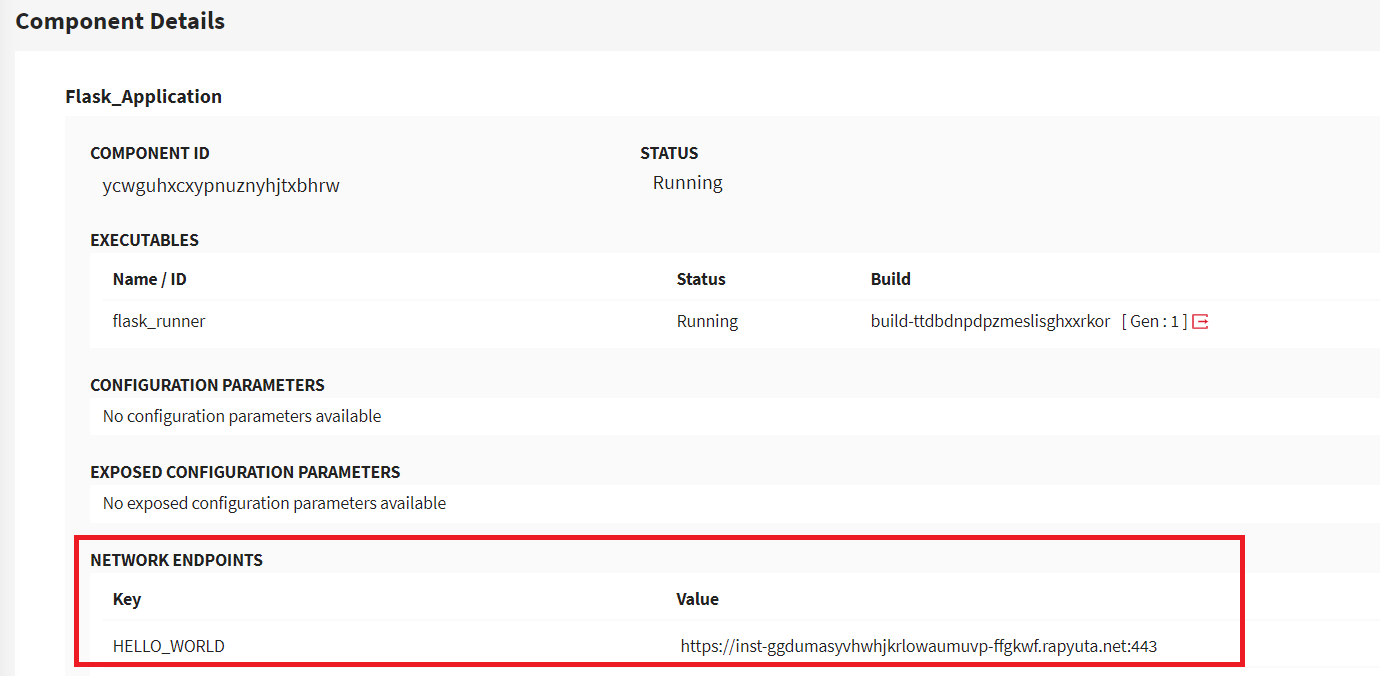
Once the package is successfully deployed, the NETWORK ENDPOINTS generates a URL address on the Details page. Copy this specific URL address (it may be different from that shown in the below image), paste in the web browser, and press Enter.
You will view Hello from rapyuta.io message.