In this article
Help us make these docs great!
All rapyuta.io docs are open source. See something that's wrong or unclear? Submit a pull request.
Make a contributionDynamic Configurations
The Publisher for Configured Devices is a ROS package that will be deployed on a device, which is configured based on a set of parameters like name, location, velocity, etc.
Learning objective
The tutorial will show you how to apply configuration parameters to a device before deploying a rapyuta.io package on it.
Prerequisites
-
Device requirements
- You should have access to a device (computer or Raspberry PI 2 or 3) with an internet connection.
- Ensure that the Google Chrome browser is installed on the computer.
- Ensure that the ROS Melodic Morenia is installed on the device.
-
You should be familiar with the configurations concept.
-
Read the quick starting guide on how to apply configurations to devices.
-
You should be familiar with the following tools:
Estimated time
15 minutes
Tutorial walkthrough
The tutorial consists of the below steps:
- Define a configuration
- Prepare a device
- Add the device to rapyuta.io
- Apply configuration parameters to the device
- Add a ROS package to rapyuta.io
- Deploy the package on the device
- Verify deployment logs
Tutorial Video
Applying Dynamic Configuration
Defining configuration
You will define the configuration robots as follows:
-
On the left navigation bar, click Development>Configurations.
-
Click ADD NEW CONFIGURATION.
-
Provide a name, for example, robots for the configuration in the Configuration Name box.
-
Click CONFIRM.
-
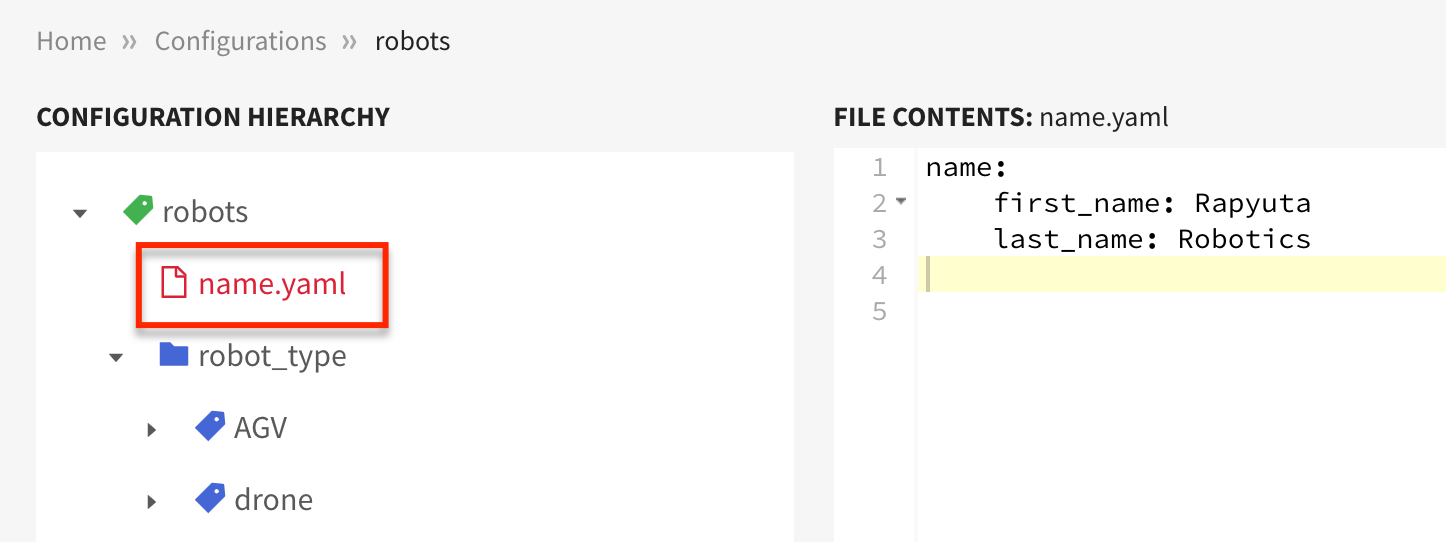
Add a new file, name.yaml, below the root node robots.
-
Define parameters in the name.yaml.
For more information about configuration parameter, click here
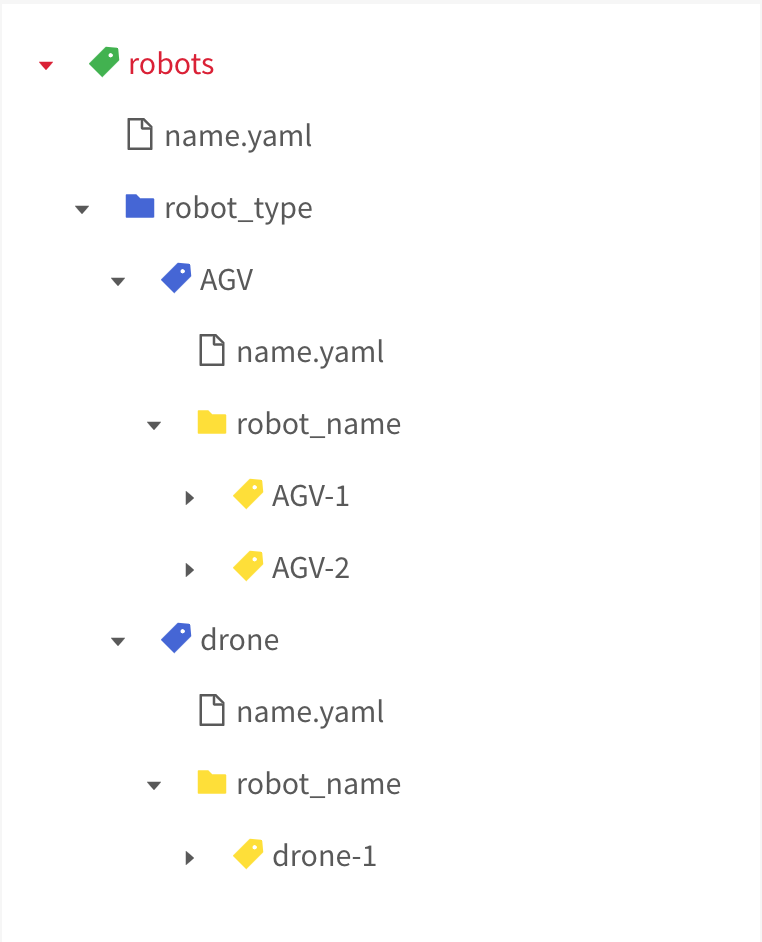
Similarly, define parameters in all of the name.yaml files occurring below the various value nodes and the root node. For example,
- robots root node
- drone value node
- drone-1 value node
- robots root node
Preparing device
The tutorial will use Raspberry PI as the device. Learn how to prepare the device.
If you are using the custom rapyuta.io image on the device, you need to execute the following command to update the io_tutorials repository at the root of your catkin workspace.
git pull https://github.com/rapyuta/io_tutorials
To build the package, run the below command at the root of your catkin workspace.
catkin build param_talker
Adding a device to rapyuta.io
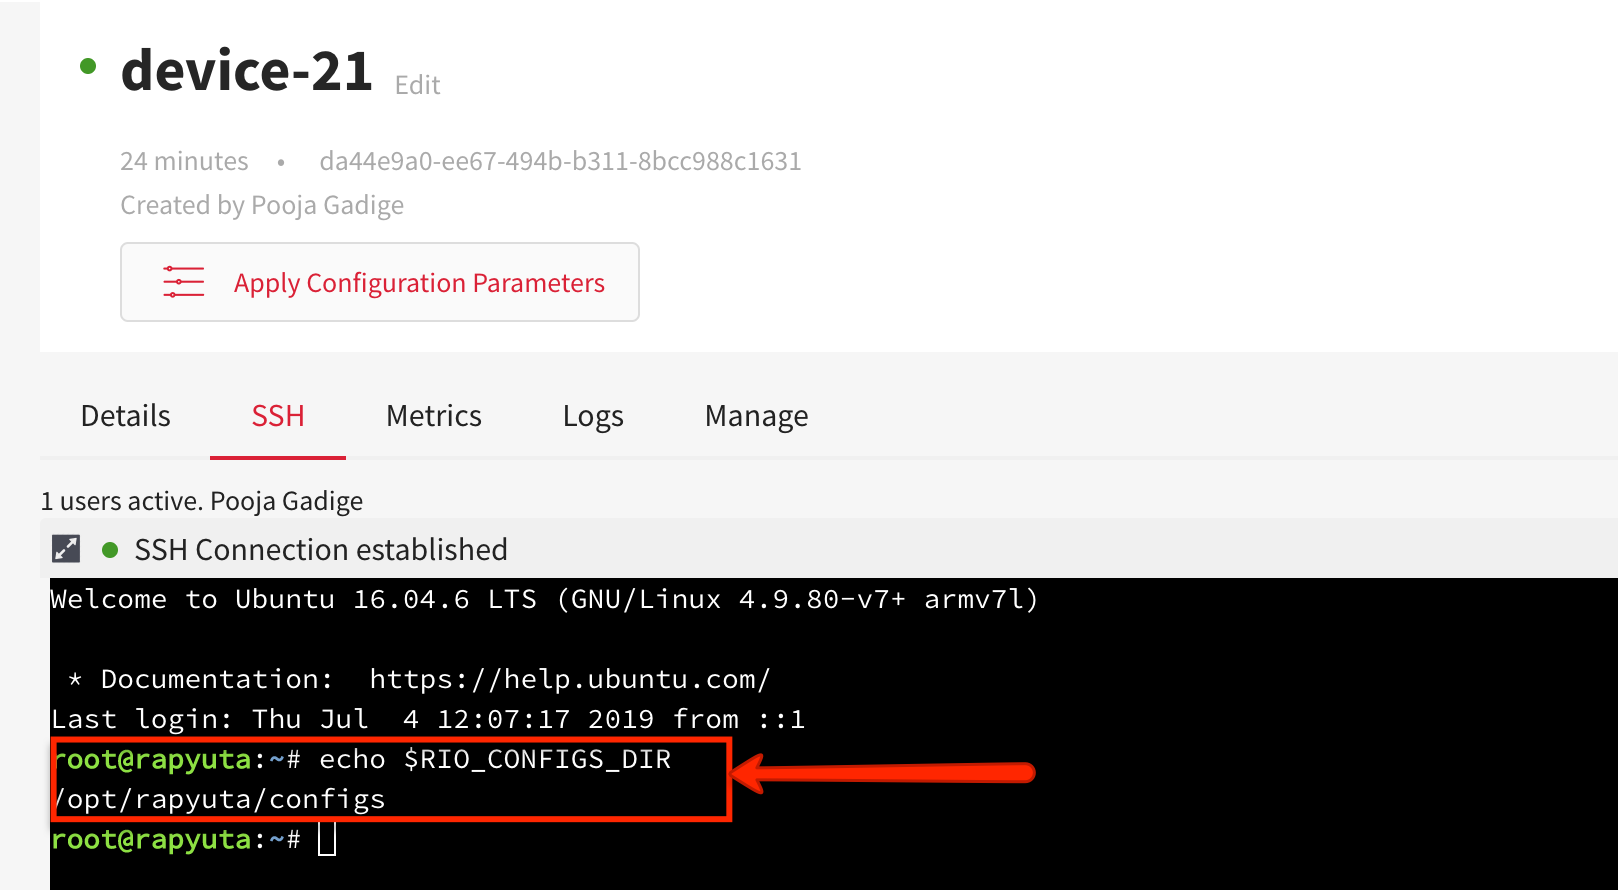
When onboarding the device to rapyuta.io, the environment variable RIO_CONFIGS_DIR is set locally on the device. It is the location of the directory where all of the configurations that will be applied to the device are stored.
The value of RIO_CONFIGS_DIR is set to /opt/rapyuta/configs

RIO_CONFIGS_DIR is available to all the executables of a running deployment.
Applying configuration to a device
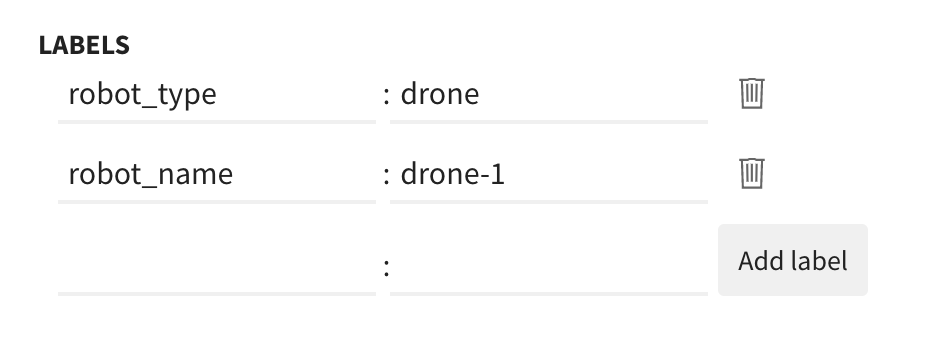
You should define labels for the device so you can apply configuration parameters to it. You will define the following labels in this tutorial:
- robot_type: drone
- robot_name: drone-1
To apply an existing configuration to the device:
- On the left navigation bar, click Devices>All Devices.
- Select the device you would want to apply the configuration to.
- Click Apply Configuration Parameters.
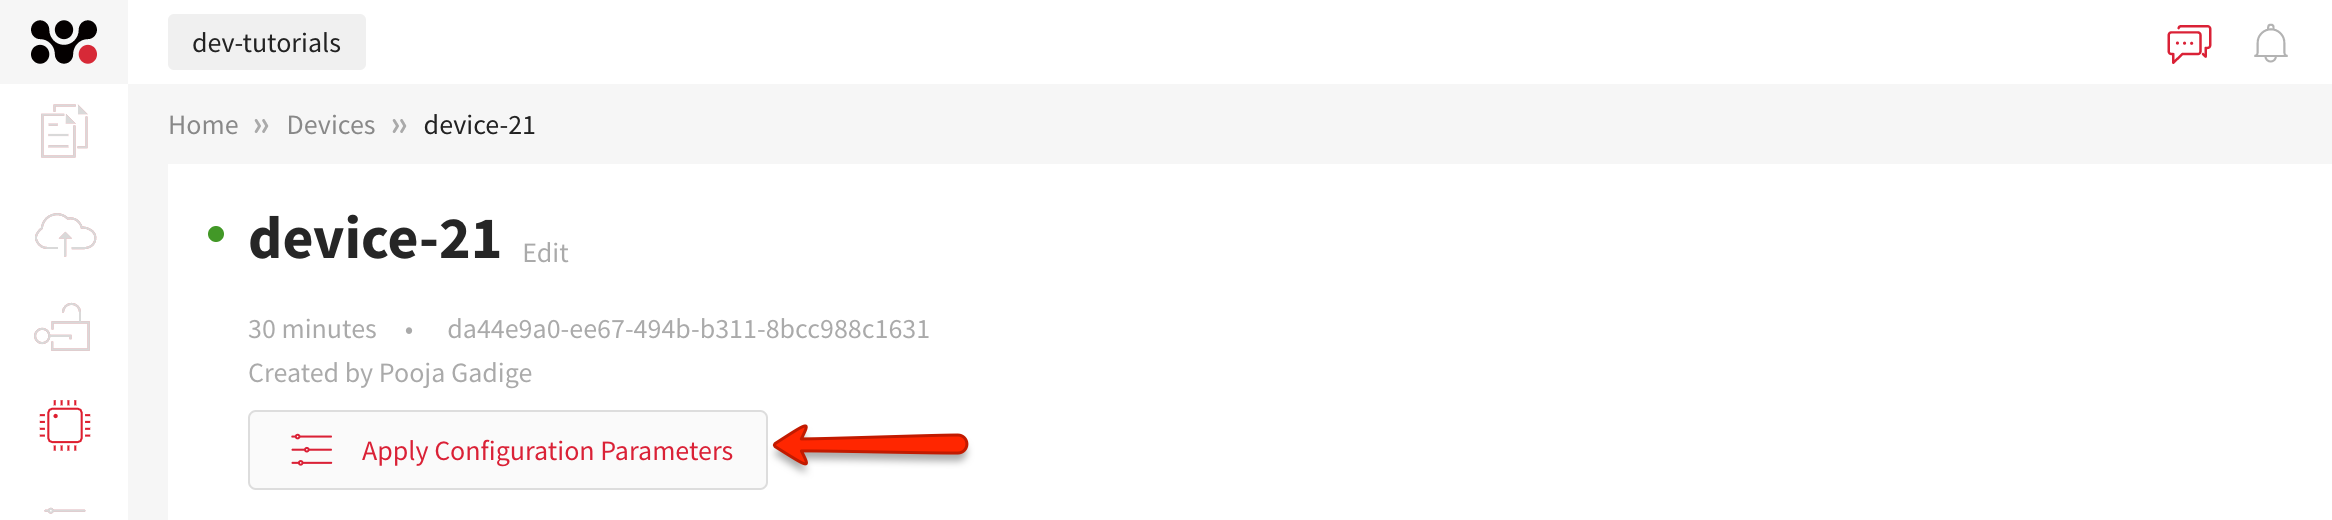
- Click CONFIRM APPLY.
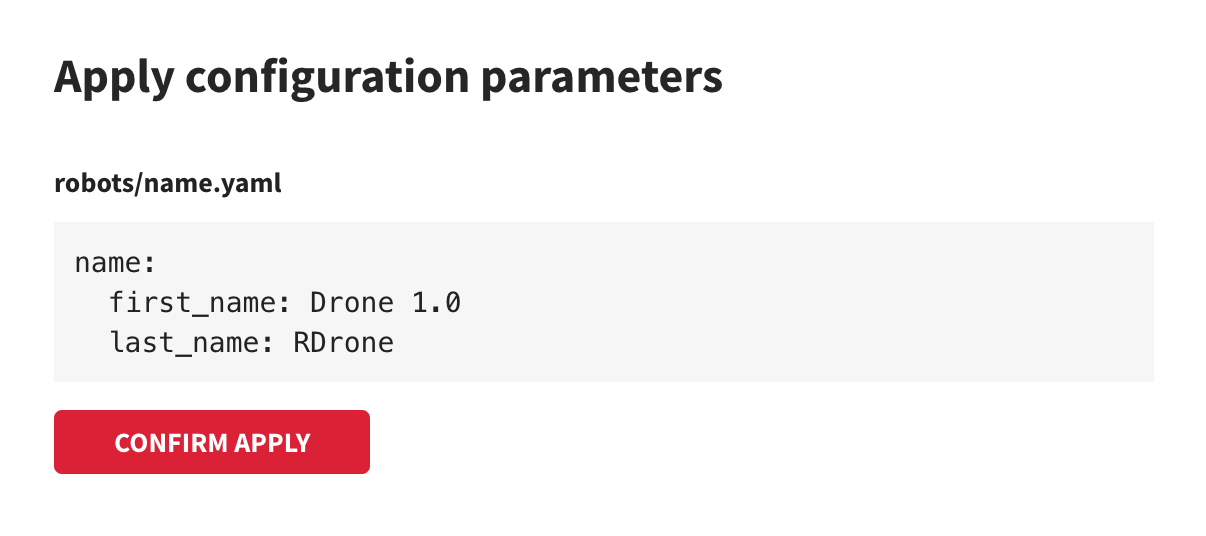
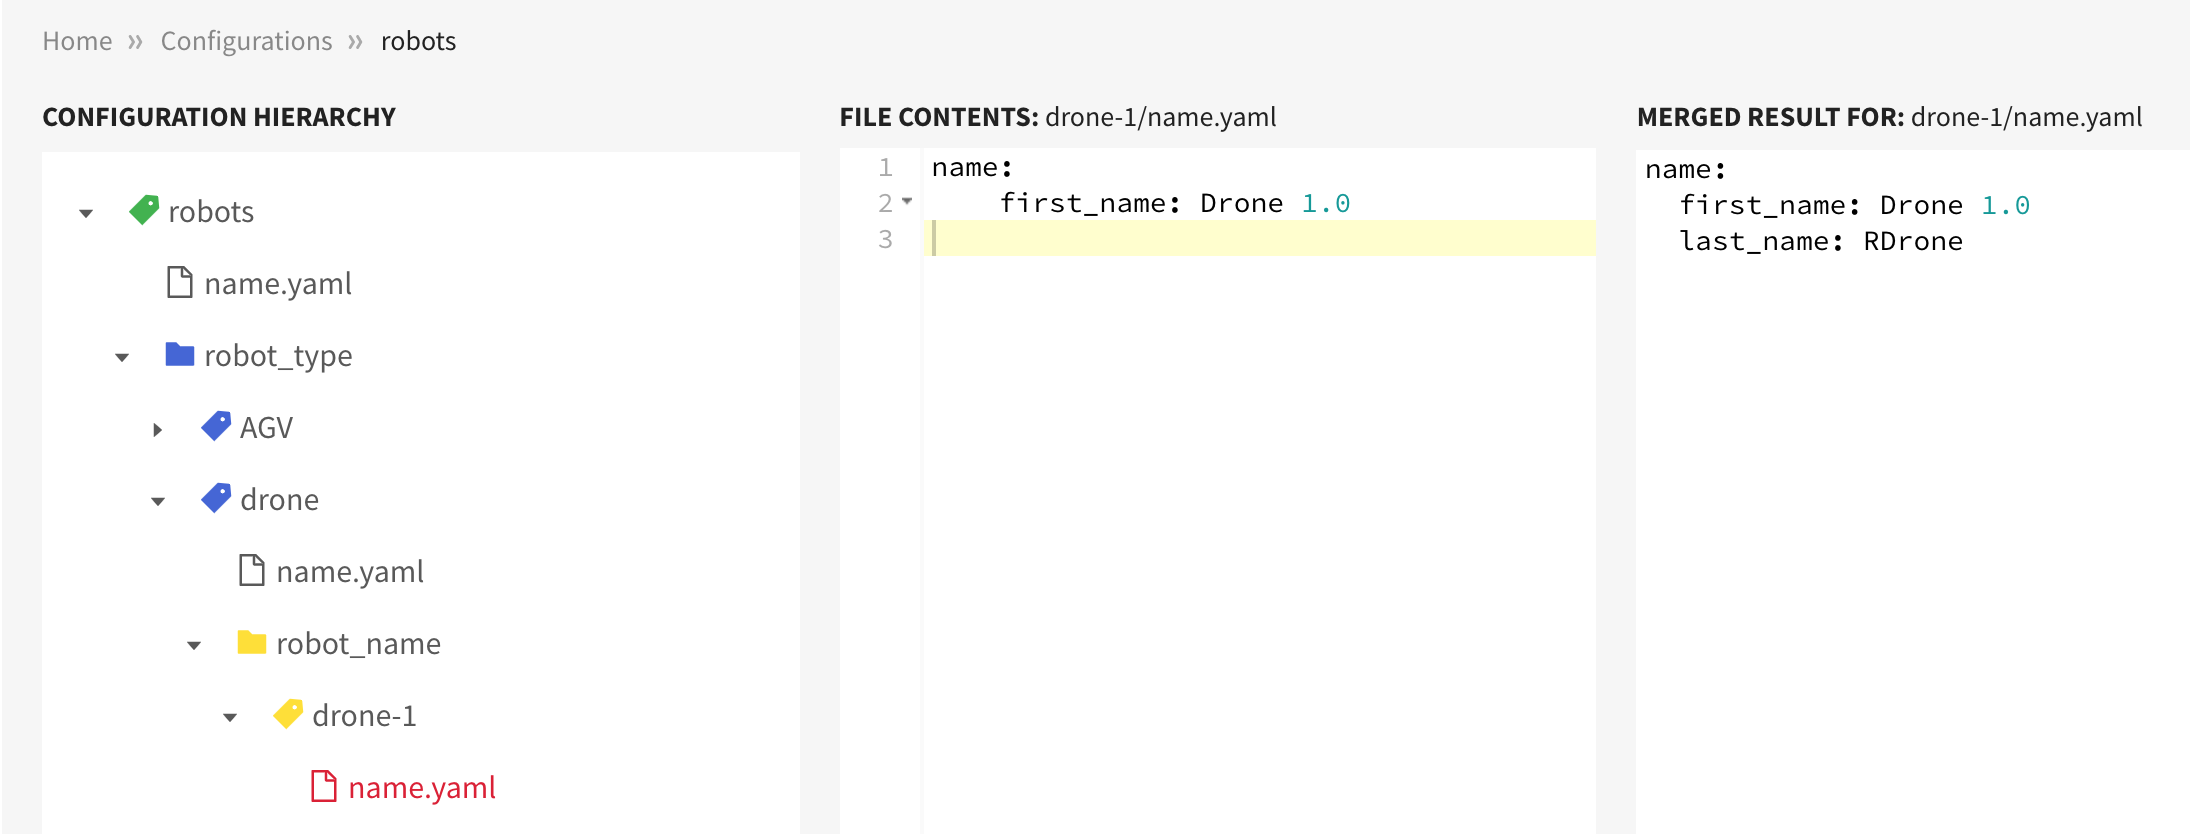
The set of device labels (robot_type: drone, robot_name: drone-1) are resolved to select the drone-1/name.yaml file, and thus, apply the below configuration parameters:
name:
    first_name: Drone 1.0
    last_name: RDrone
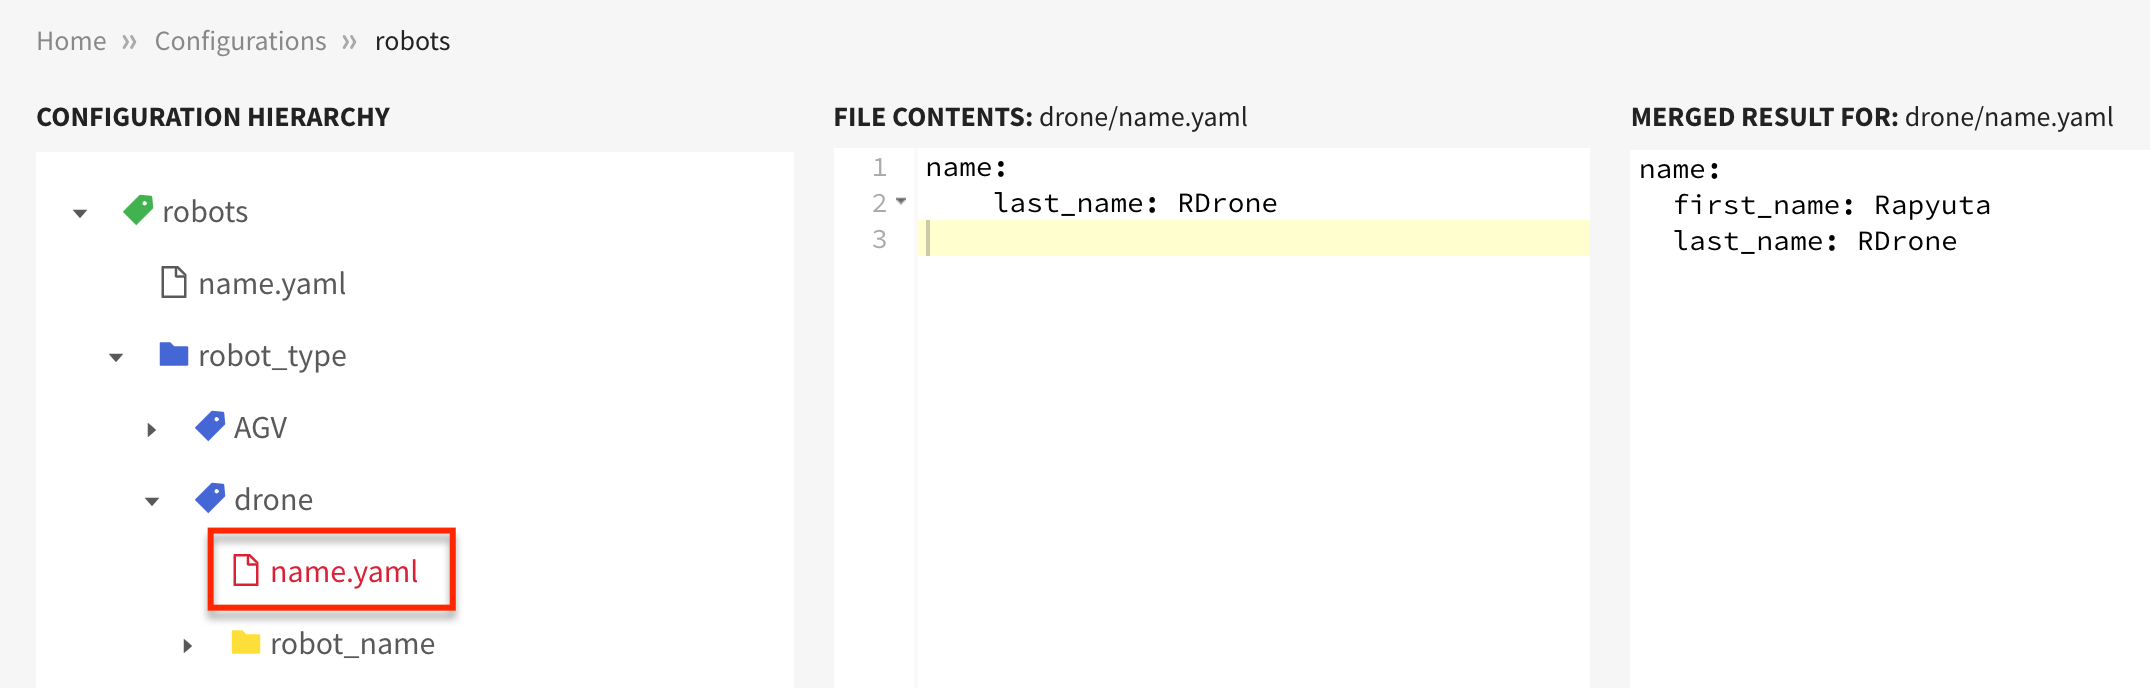
Had you given a device label, for example, robot_type: drone, rapyuta.io would traverse the configuration tree, select the drone/name.yaml file and apply the configuration parameters found in the file. Similarly, if no device label is defined, name.yaml file will be selected for the application of configuration parameters defined in the file.
You may apply more than one configuration to a single device.
The robots configuration is stored in RIO_CONFIGS_DIR and its parameters file name.yaml is stored in the robots (corresponding configuration) directory as shown in the figure below.


You can use RIO_CONFIGS_DIR in ROS launch files for loading configurations.

You can remotely access RIO_CONFIGS_DIR by SSH-ing into the device via rapyuta.io
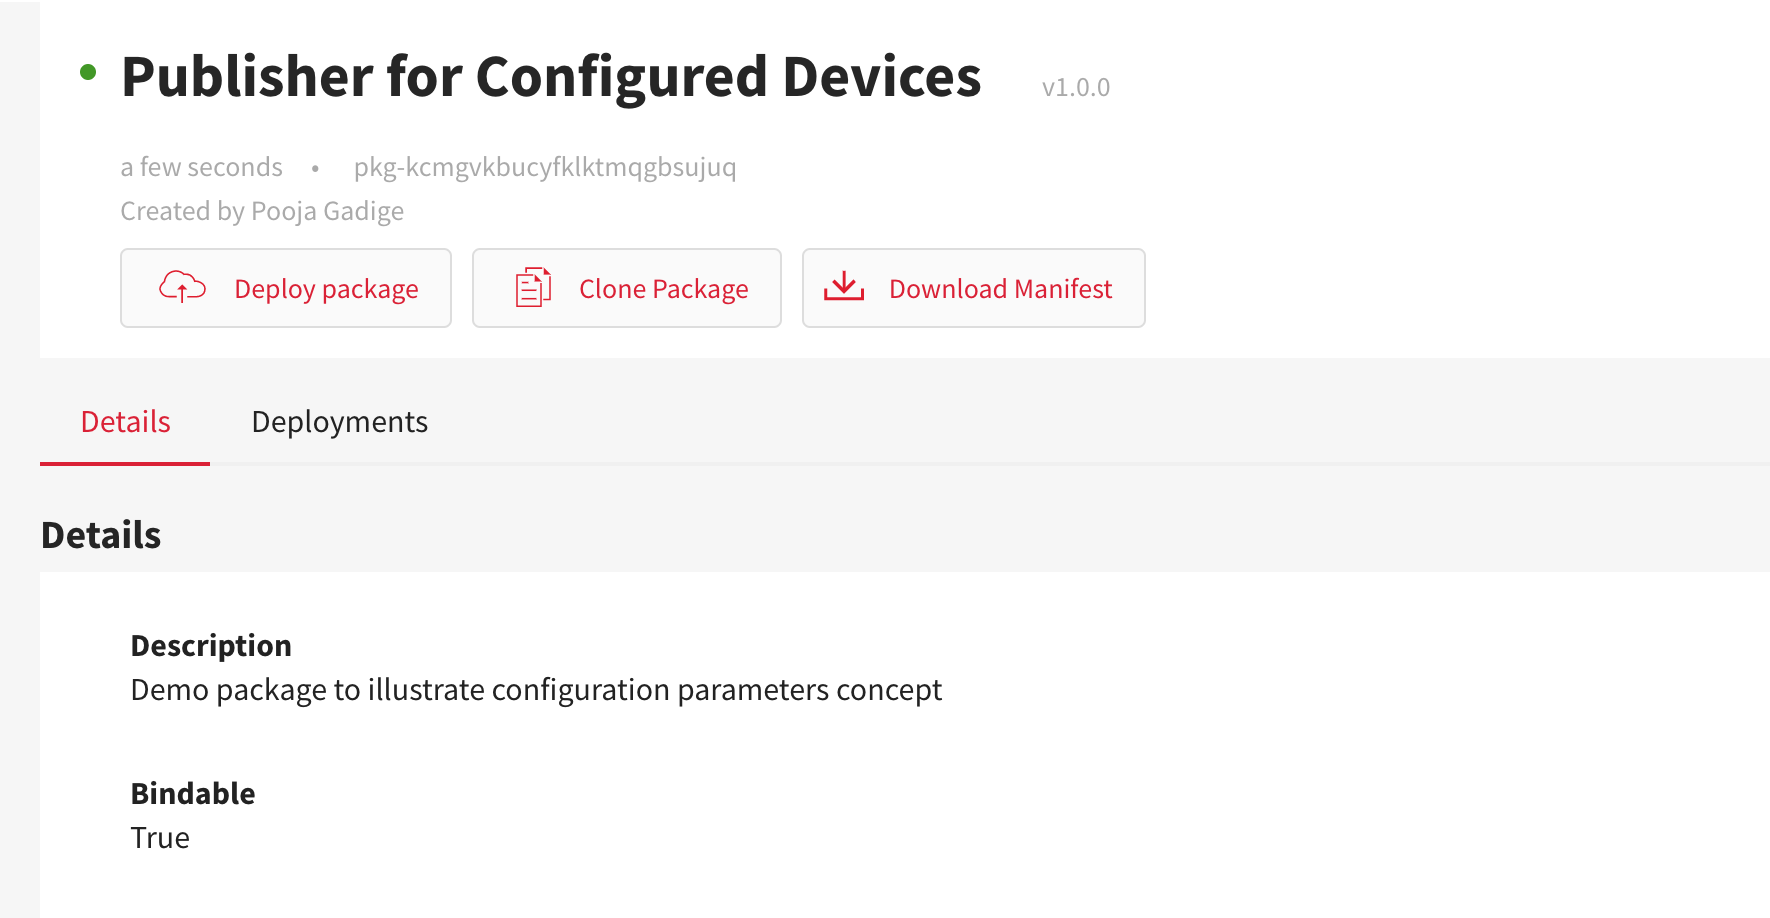
Creating the package
To create the Publisher for Configured Devices package, follow the steps:
-
On the left navigation bar, click Development > Packages.
-
Click ADD NEW PACKAGE.
-
Provide a name for the package, for example,
Publisher for Configured Devicesin the Package Name box. -
Make sure Is singleton package is not selected.
-
Ensure Is a bindable package is indeed selected.
-
In the Description box, provide a summary of the package, for example,
Demo package to illustrate configuration parameters concept -
Click NEXT.
-
In the Component Name box, enter a name for the component, for example,
parameter_talker. -
Select Device for Component Runtime.
-
Ensure Is ROS Component is selected.
-
Ensure the ROS Version is Melodic.
-
In the Executable Name box, enter a name for the executable, for example,
talker_executable. -
Select Default for Executable Type.
-
Enter
roslaunch param_talker talker.launchin the Command to run in the docker container box. -
Click NEXT > CONFIRM PACKAGE CREATION.
Deploying the package
To deploy the Publisher for Configured Devices package, follow the steps:
- On the left navigation bar, click Development > Packages.
- Select the Publisher for Configured Devices package.
- Click Deploy package.
- Provide a name for the deployment you are creating, for example,
Configurations Publisherin the Name of deployment box. - Since parameter_talker has device runtime, you must select the device you want to deploy the component on. Click Refresh the list of online devices to retrieve an updated list of online devices.
- Select the device from the Select device for deploying the component drop-down list.
- For the parameter_talker component, ensure that ros_workspace and ros_distro are selected.
- Click CREATE DEPLOYMENT > Confirm.
You will be redirected to the newly created deployment’s Details page. The Configurations Publisher is successfully running when the green colored bar moves to Succeeded and Status: Running point indicating that the DEPLOYMENT PHASE is Succeeded and the STATUS is Running.

Verifying deployment logs
You may verify the correctness of the tutorial by analyzing the corresponding deployment logs by clicking on the Historical Logs.
The historical logs will display the output as shown:
hello Drone 1.0 RDrone
The output contains values of the first_name and last_name parameters for the drone-1 device.
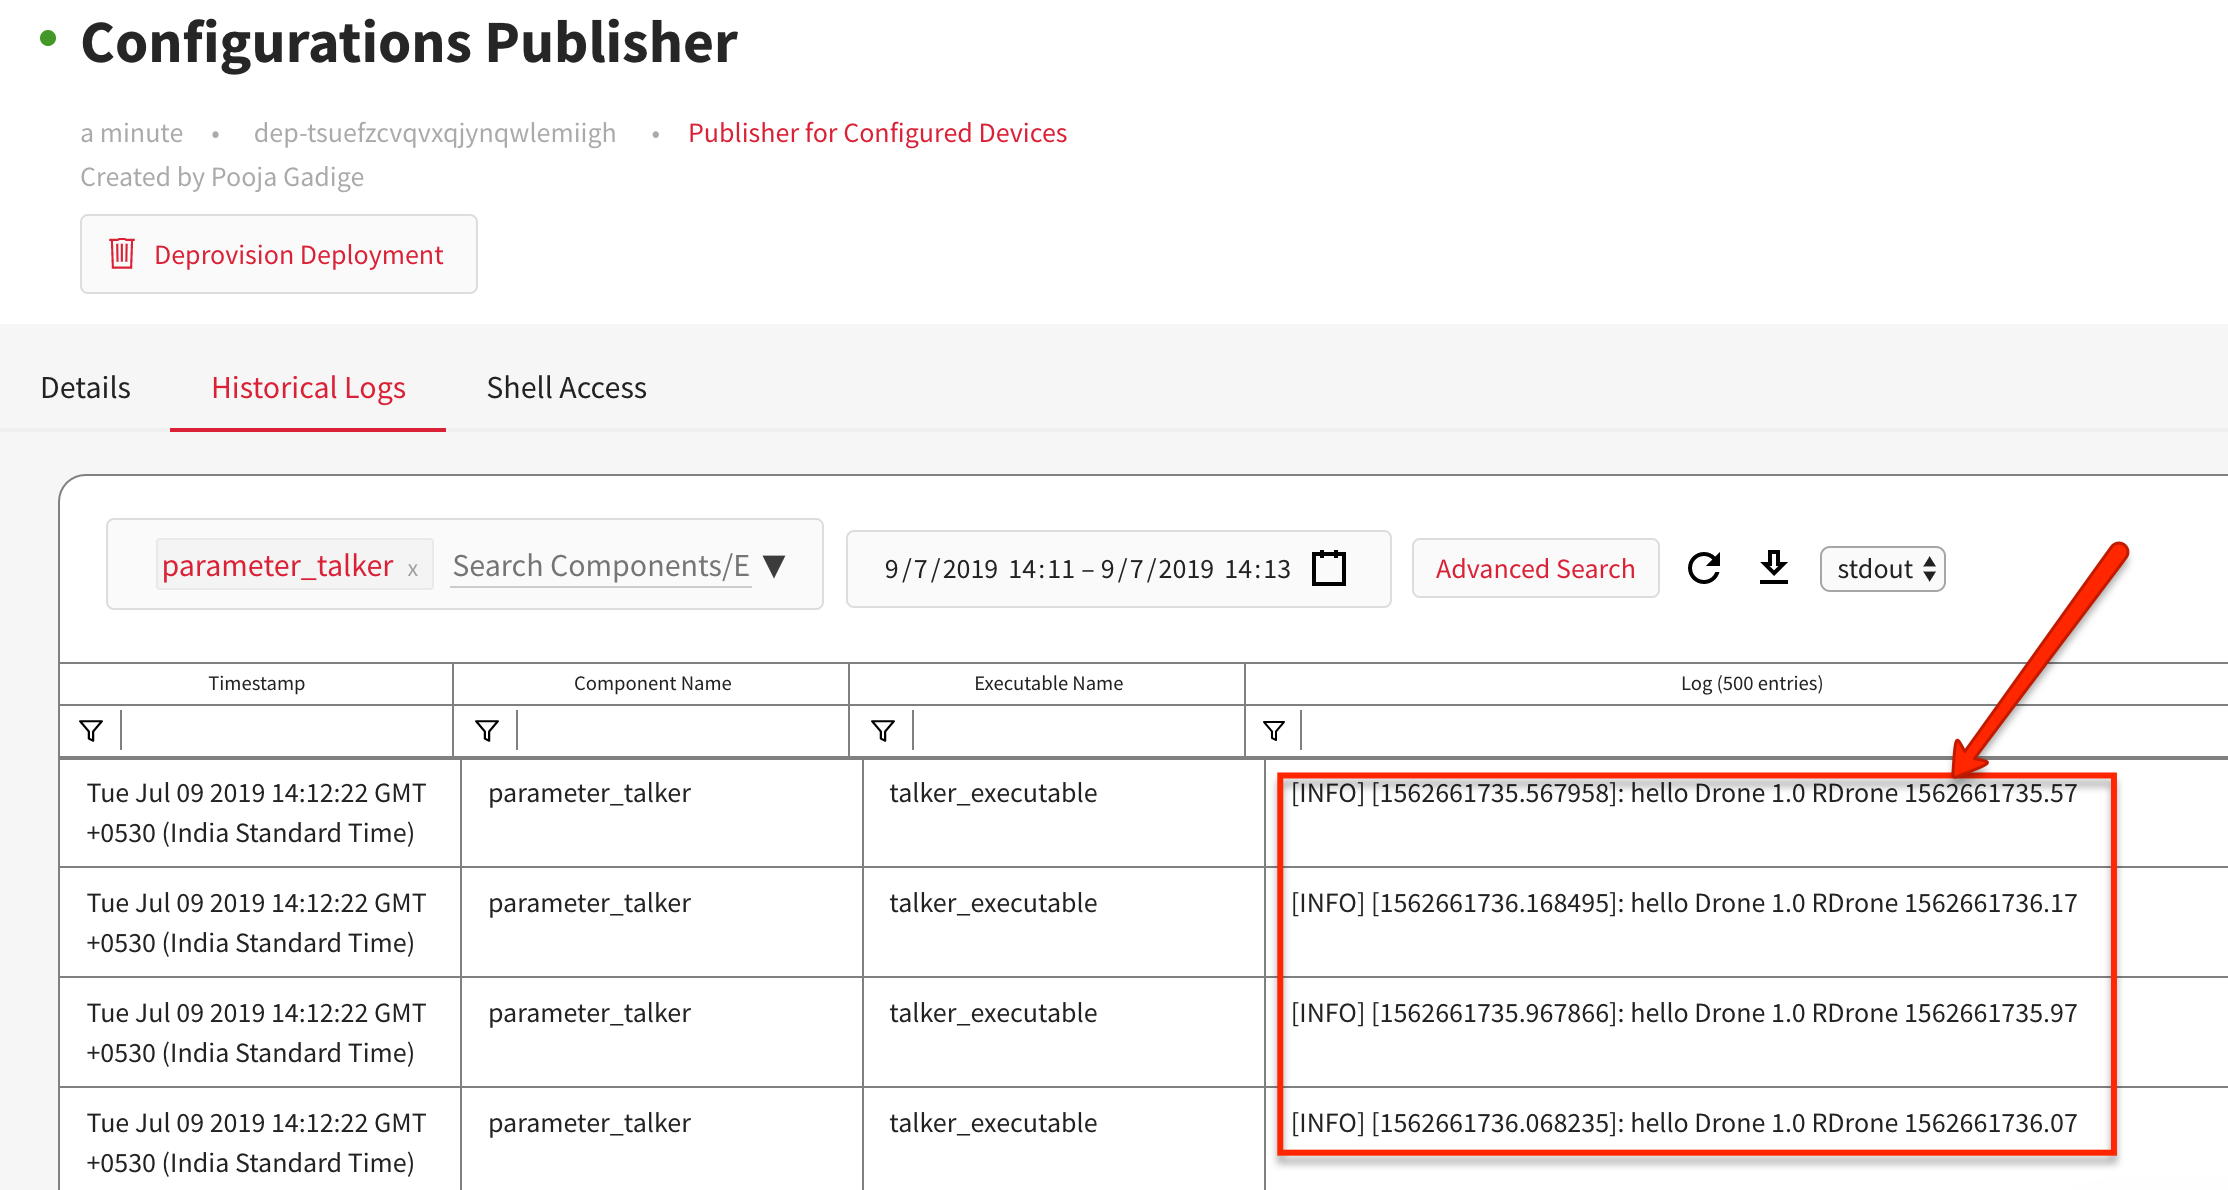
Your output may be different based on the device labels you define.